Drachenwald: Polderslot Costume Workshop ~ September 2022
Ansteorra: Kingdom Collegium ~ July 2025/A.S. LX
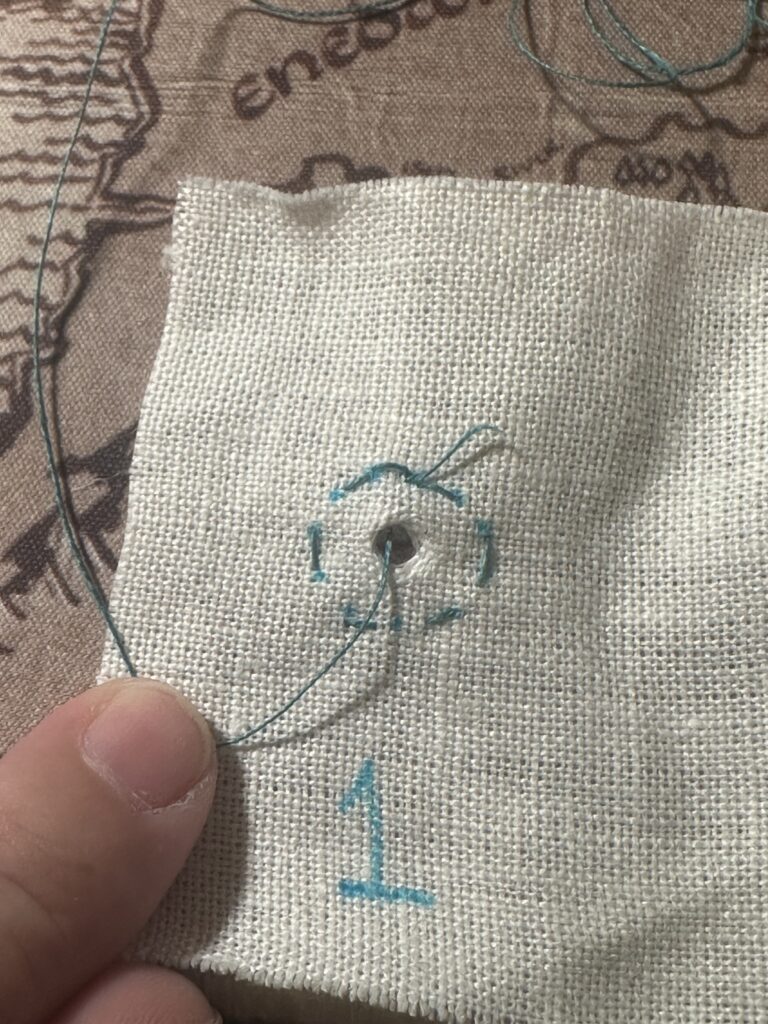
This is the gallery for both methods of making self-stuffed buttons, as well as various methods for making hand-sewn eyelets.
I have found a shot glass to be an ideal size for making self-stuffed buttons.3″/5cm diameterDO NOT KNOT. Instead, do a single backstitch; this will be enough!Stitching around the edge. The smaller the stitches, the better the results.Drawn closed.Stitch through the RIDGES and stay close to the edge.Finish on the inside.Draw closed, then stitch into the valleys to make a “star”-shaped pattern (roughly!). Use your fingers to reshape, if needed.Method two: halfway between the center and the outer edge. Use chalk or a marker if you need guidance. Backstitch to start — again, no knots.Running stitch. Finish on the OUTSIDE (“right” side)Fold the outside parts into the middle. Awl is for photographic purposes, DO NOT USE AN AWL. The tip of a knitting needle will work well, though.Pull the string until the button is formed. Again, stitch through the valleys in a star-shaped pattern.Use an awl to make a hole. Use a marker or chalk to mark the approximate circle; you’ll be glad you did.Do a running stitch around the edge as a guide. Stitch through the hole.Wrap the thread around the needle once. This is a blanket stitch.Pull needle through, tighten the thread, then repeat. You can go clockwise or anti-clockwise.The “ridge” is formed in the middle.Same start, but this time, put the needle through the hole first, THEN push through the fabric, THEN wrap the thread around once. Repeat in a clockwise or counterclockwise fashion. The “ridge” will appear on the outside. I think it’s a cleaner look.Ring-reinforced eyelet. I used a jewelry jump ring.1) Inner ridge 2) outer ridge 3) outer ridge with jump ring for reinforcement